Mash Tun Bazooka
On Sunday before I brewed this week I wanted to tweak my mash tun Bazooka-T set-up. Last week I had used it “dry fitted” which seemed to work considering I pulled clear wort through the valve, but I did notice a few things that I wanted to try and make better.
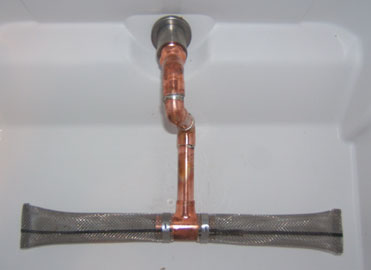
So, some of the things that concerned me last time were (a) the arrangement of the copper tubing coming out of the valve, (b) the fact that by the time I went to clean out the mash tun the tubing had separated in two locations, and (c) the fact that there was a decent amount of grain inside the Bazooka-T. The reason the arrangement of the tubing out of the valve bothered me was that it came off straight into the mash tun for about 4 inches several inches from the bottom. The biggest problem for me was I would have the tendency to bang the hell out of it every time I mixed my grains, no bueno. I remedied this by adding another 90 degree bend near the beginning to bring the pipe to the bottom first, then have the 4 inch piece run along the bottom, this only seemed to make more sense. The separation didn’t bother me as much as it could have. I found out later that I was using in correctly marked 1/2 inch tubing from the get go which is why I was having so much problems in the first place with “dry fitting” it, but after the proper tubing was used it seemed better. But, by this point I was already to solder the main pieces together anyway so I just went ahead and did it. I decided to solder all the pieces together between the Bazooka-T and the screwed fitting that screws into the back of the valve. I did this so the entire assemble would be easier to attach and unattach, plus it will make cleaning better. I believe the grain in the Bazooka-T last time was because of the tubing becoming separated, so I was anticipating that this time with the fittings mostly soldered together it wouldn’t be an issue, and it wasn’t.Â
If you look at the top picture (the bigger one) you can see the fully assembled soldered copper mash tun Bazooka-T. I know it is slightly crooked, but I will admit it was my first time soldering copper so that’s what you get, but everything fit and everything seeme dto work fine with no leaks. The thumbnail picture on the left is what the original arrangement looked like, except the screen was turned 90 degrees. The thumbnail picture on the right is the new style arrangemen, again with the screen turned 90 degrees. More about the brew day itself later.


