Archive for the ‘Homebrew’ Category

Hazelnut Brown

Tuesday, April 17th, 2007

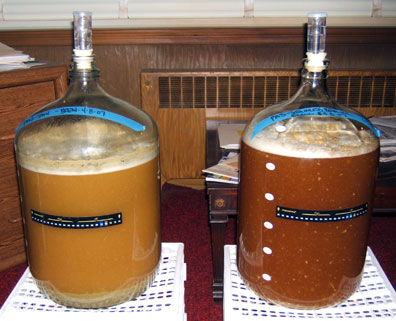
On Sunday I brewed a beer that will hopefully turn out similar to Rogue’s Hazelnut Brown Nectar. It should be a cross between a mellow American Brown ale and a Robust Porter, leaning to the brown side, with a definitive hazelnut flair.
hazelnut-brown2.jpg

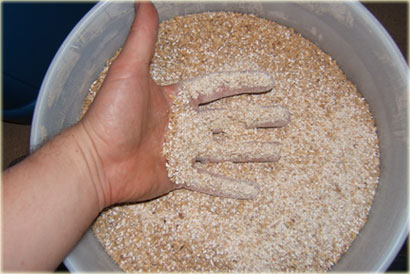
I had somehow printed but not saved the recipe in ProMash, the brewing recipe program I used. So, I had to retype in the recipe – and again I forgot to save, so again I retyped it in. This made me feel very stoopid. Then I got to play with my new grain mill again, so far it is still fun. Karen was interested to see it in action, so I let her weigh all the grains and load the hopper. Unfortunately, right when she was getting ready to grind she got a long distance phone call. With the big storm here, I had to relocate my typical brew spot. So, I hauled everything up from the basement and brewed in the garage with the door wide open for proper ventilation.  It was cool to brew in there, but it was a pain in the balls hauling everything up, and running up and down when ever I realized I forgot something. I added a small second burner to my set up now too. I don’t need it for anything, but it’s useful to have available if I wanted to sterilize something with boiling water (like my oxygen stone) or to pull some wort and boil it down to add some extra character.

Right before the end of the mash and while my sparge water was still heating I ran out of propane! This is the second time this has ever happen to me. After the first time, I bought a back-up tank, but this time the back-up was empty too.  So, I put everything on hold and made a propane run which wound up taking a good 45 minutes. Buy the time I got back the water temperatures had dropped, but not as bad as I had thought. So, after everything was set, I mashed-out, recirculated, and began my sparge which went OK until the last little bit. Basically I have a crappy pick-up tube on the inside of the HLT. Again, since the valve comes in at a 45 degree angle, something has to be used to connect the valve to the bottom. In the mash tun I have the copper Bazooka-T, in the HLT I have a piece of reinforced plastic tube. Well, the problem is when the tube is heated by the 175 degree sparge water it softens and begins to loosen around the connector to the valve. No problem I thought, I’ll put a hose clamp around it. Well the OD on the hose is like 5/8th and I didn’t have a hose clamp big enough, so I tried using what I had available – a zip tie. It didn’t work. It wasn’t that big of a deal, I just stood there and tipped the HLT, problem solved, but not permanently.

After the sparge was through everything on the boil side seemed to go fine, nothing that I can really remember standing out. Again, Karen came out and chilled which is always nice. When it was time to cool I was worried that my “brew hoses” weren’t going to be able to reach the garden spigot, but they did, so no problems there. I had to do a little rearranging in the fermentation room (computer room) to make sure there was room, so I took PA3 which had finished fermenting down to the bottling area (laundry room), which is different than the secondary fermentation area (chamber number two). When the brew day (minus cleaning up) was done, I stopped for about an hour for a break and to eat some dinner Karen made. After clean up it was somehow like 10PM. My OG was much higher than anticipated, up in the range of almost 90% efficiency Hopefully this will hold true for the new mashing equipment, which would mean I could use less ingredients to gain the same results, thus saving money. So between retyping the recipe twice, playing solder boy with the copper piping, hauling all my crap around, brewing, making a propane run, finish brewing, moving carboys, eating, and cleaning up it turned out to be almost a 12 hour day! Don’t know how that happened, but I was wooped. Plus the fact that Sunday was day 7 of being sick (today is day 9) didn’t help much either.

hazelnut-brown1.jpg

 So next up on the brew schedule are two wheaty beers, so this should be interesting. I am planning on brewing a Witbier and a Saison, which I have never brewed the later. Both styles are quite refreshing so that’ll be nice going into the warmer time of the year. Then hopefully something big and stinky to lay down for winter: a Russian Imperial Stout, or Old Ale.
Mash Tun Bazooka

Tuesday, April 17th, 2007

On Sunday before I brewed this week I wanted to tweak my mash tun Bazooka-T set-up. Last week I had used it “dry fitted” which seemed to work considering I pulled clear wort through the valve, but I did notice a few things that I wanted to try and make better.

 mtbazooka3.jpg

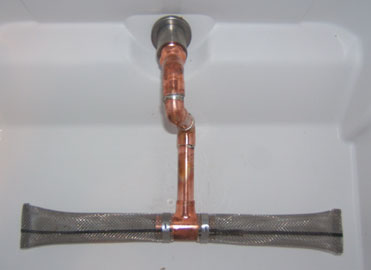
So, some of the things that concerned me last time were (a) the arrangement of the copper tubing coming out of the valve, (b) the fact that by the time I went to clean out the mash tun the tubing had separated in two locations, and (c) the fact that there was a decent amount of grain inside the Bazooka-T. The reason the arrangement of the tubing out of the valve bothered me was that it came off straight into the mash tun for about 4 inches several inches from the bottom. The biggest problem for me was I would have the tendency to bang the hell out of it every time I mixed my grains, no bueno. I remedied this by adding another 90 degree bend near the beginning to bring the pipe to the bottom first, then have the 4 inch piece run along the bottom, this only seemed to make more sense. The separation didn’t bother me as much as it could have. I found out later that I was using in correctly marked 1/2 inch tubing from the get go which is why I was having so much problems in the first place with “dry fitting” it, but after the proper tubing was used it seemed better. But, by this point I was already to solder the main pieces together anyway so I just went ahead and did it. I decided to solder all the pieces together between the Bazooka-T and the screwed fitting that screws into the back of the valve. I did this so the entire assemble would be easier to attach and unattach, plus it will make cleaning better. I believe the grain in the Bazooka-T last time was because of the tubing becoming separated, so I was anticipating that this time with the fittings mostly soldered together it wouldn’t be an issue, and it wasn’t. 

mtbazooka2.jpgmtbazooka1.jpg

If you look at the top picture (the bigger one) you can see the fully assembled soldered copper mash tun Bazooka-T. I know it is slightly crooked, but I will admit it was my first time soldering copper so that’s what you get, but everything fit and everything seeme dto work fine with no leaks. The thumbnail picture on the left is what the original arrangement looked like, except the screen was turned 90 degrees. The thumbnail picture on the right is the new style arrangemen, again with the screen turned 90 degrees. More about the brew day itself later.

Double Brew Day

Monday, April 16th, 2007

I’m still trying to play catch-up on the posts, I’ll get there eventually. Anyway, last Sunday the 8th was a double brew day, I think my first one that I have ever attempted, or least in such a long time that I have forgotten about it. So I brewed two back-to-back batches – both pale ales.

Double Brew

The first batch was an all grain pale ale (PA2) brewed with Amarillo, Simcoe, and Warrior hops  using the DFH continuously hopping method a la Sir-Hops-A-Lot. The second batch was an extract pale ale (PA3) brewed with a “mystery” kit from MoreBeer in preparation of their Stainless Brewer Competition. PA2 was the first beer brewed with the new converted mash tun and HLT, and the first to put the new grain mill to use, so it was fun and a little bit more stressful. The mash tun seemed to work great, even though the fittings were just “dry fitted” together.

I actually was busy doing something the rest of the weekend, so I didn’t even really get to mess with the new fittings for the coolers until Sunday morning. Plus, did I forget to mention I transfered over the “Chunky” Pale Ale (PA1) during this brew day too? I think the day went something along the lines of: Work on mash tun and hot liquor tank in the morning, begin to brew before noon, transfer PA1 during some part of brewing PA2, decide I already have all my stuff pulled out and that since PA3 is an extract batch it may go a little faster, and brew PA3 into the evening early night. The worst part was obviously clean-up, I hate it already and the longness / multiple activities just made it worse. Oh, I threw PA1 on some Centennial and Cascade hops and oak chips too – just to keep it interesting.

I’m sure I could have made this post much more interesting if I would have posted closer to the date, but by this point this is what I have left, hope you enjoyed anyway.

Mash Tun / HLT Conversions

Thursday, April 12th, 2007

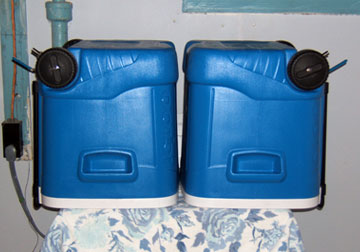
 Another project long in the wings saw some progression last weekend. I have been slowly working on converting two coolers into a new mash tun and hot liquor tank (HLT). Part of the reason the process has been taking so long is that I wanted to do this once and not have to worry about volume and shape and other variables too much. There is still work to be done to both the mash tun and HLT, but I suppose they are usable at this point since I have officially brewed a batch of beer with them.

MT1

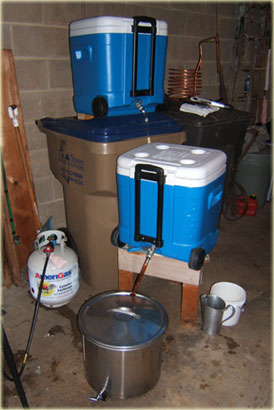
I finally made the decision to go with a 60 quart Igloo Ice Cube cooler. The main reasons for this being that (1) theoretically the tall square type shape would help the grain bed have sufficient depth vs. a rectangular cooler in which the grain bed would cover a larger surface area thus having a shallower grain bed and possibly not enough overall mass to mash and sparge properly. (2) With one mash tun I will be able to brew any style of beer that calls for water infusions to control the mash temperature (vs. decoction, HERMS or RIMS). (3) And, when I upgrade my kettle to most likely a converted Sanke keg (another project in the wings)  I should be able to brew most styles of beer in a 10 gallon format (twice as much as now) with the same mash tun and HLT.

 Originally I was aiming to find/buy the non-wheeled 60 quart Igloo Ice Cube coolers. The advantage of them are that they have the spigot  come into the cooler parallel to the bottom. The main disadvantage is they are almost impossible to find in the 60 quart size without ordering them, and then they cost twice as much as the wheeled versions plus shipping. So, I bought the wheeled version of the coolers. The potential advantages are that with the wheels moving the cooler either empty of full should be easier, plus they are much more easily accessible at the stores and fit the budget perfectly. The biggest disadvantage is (which we’ll see how bad it really is) that the spigot comes into the cooler at a 45 degree angle to the bottom. I suppose Igloo chose to do this because of the wheel configuration, but it seems odd considering that the spigot is on a totally different side on the non-wheeled coolers.

Anyway, because of the angle of the spigot I had to rig-up some extra tubing to be able to reach the middle bottom of the cooler to extract the sweet liquor. Originally I was planning on building a full copper manifold, which is basically a series of parallel copper pipes with slots or holes cut into the bottom to strain the liquid from the solid bits in the mash tun. But instead I opted on trying a Bazooka-T mash tun screen. This is basically a copper T fitting with stainless steel mesh arms that filter out the bits and a copper tube which come from the middle and leads to the spigot on the mash tun. After I have brewed a few batches with this set-up and if I am happy with the results, I will stick with the Bazooka-T, if not I’ll try to build a manifold for it.

 MT7MT3MT2MT5MT4MT6

So far both the mash tun and the HLT have had the old spigots replaced with 1/2 inch stainless steel ball valves. I also have a 6 inch probe stainless steel thermometer to mount in the mash tun which isn’t mounted yet. Plus, so far, the copper parts for the mash tun have only be dry fitted, they still need to be soldered together. Oh yeah, and the pick-up tube in the HLT needs a little tweaking too. Like I said, I have been dragging my feet with these things for quite some time now, but now that things are in motion I think I’ll want to see them come to completion. So for now I am satisfied with the direction the project is going in.

Grain Mill

Thursday, April 12th, 2007

Almost two weeks ago now I received a new toy in the mail that I have wanted for some time now, my new grain mill! There are many different brands out on the market available to homebrewers, and several are supposed to be very good. I narrowed my choices down to two companies the Barley Crusher and the Crandandstein mills.

Mill3

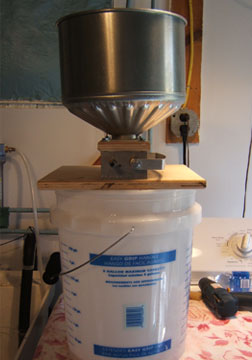
I decided to lean a little in favor of the Crankandstein because I have actually seen it in action. On there website they offer many different varieties that all accomplish the same goal, to crush grains in particularly malted barley. I decided to go with their packaged deal which they offered. It includes a base to hold the mill/to rest on top of wherever the gains will be going (ie – a bucket), the mid-level mill itself (the model the owner of the company actually uses), a mounting board for the grain hopper, and the grain hopper itself. This mill is fully adjustable like most of the others just not as easy to adjust as some. Some of the mills they offer have three rollers which double crush the grains vs. mine which has two rollers. All of the mills are meant to be drill or motor powered though they do offer an optional handle. I chose the drill technique

The objective of a grain mill is to squeeze the endosperm (inside) of the grain from the husk (outside), trying to leave as much of the husk in tack as possible and crushing the endosperm as much as possible without turning it to flour. The endosperm is where all the starches of the grain are which is what gets converted to sugar during the mash, which in turn is what the yeast metabolize to make the beery-goodness we so love, and the husk is where the different malty flavors and color come from. The husk also works as a natural filter bed during the sparging/run-off process to help keep as much of the grain bits in the mash tun while extracting as much of the sweet liquor called wort.

Mill2Mill1

So far I have only used the mill twice, once to clean it/test it and once to actually crush grain for a recipe, a Pale Ale brewed with Simcoe, Amarillo, and Warrior hops – yum! I think I am going to be very pleased with this mill in the long run, and should never have to buy or upgrade to a new one as long as I maintain it and keep it clean. The only thing that would really make it better would be to motorize it, but that’s another project for another day (Garrett you bastard!).

Oatmeal Stout Experiment Tasting

Wednesday, April 11th, 2007

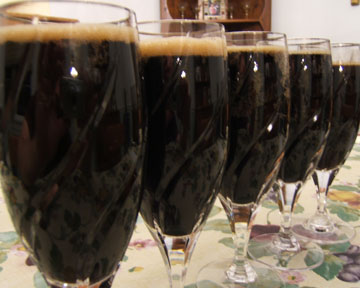
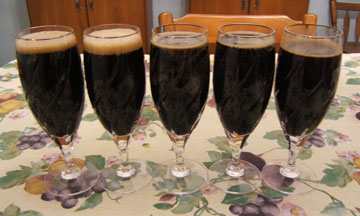
Last Wednesday Karen & I tasted all of the different flavors from the Oatmeal Stout Experiment. Just to recap these were: “Plain” Oatmeal Stout, Vanilla Oatmeal Stout, Bourboned Oak Oatmeal Stout, Coffee Oatmeal Stout, and the ever popular Cocoa Pebble Oatmeal Stout. I tried to pour them all in the same glass at about the same time and temperature.

Stout 2

These reviews are going to be based on memory. I didn’t take any notes because I thought I would have posted much sooner. Because of that they may too be shorter.

  • The “Plain” Oatmeal Stout was good, but nothing extraordinary. I will say that it is the best stout I have ever brewed. Creamy, smooth, yet still robust. Don’t get me wrong, when I say not extraordinary I’m not saying it is bad, just not ‘Oh-My-Gawd-My-Stout-Kicks-Your-Dark-Lord’s-Ass-So-Bring-It-Stout’. But it was a perfect base beer to build this experiment from. The biggest draw back is because of the experiment I have fewer bottles.
  • The Vanilla Oatmeal Stout was love-good, but very vanillay. The more you drank it, the more it seemed appropriate, but initially it was very intense. The smell was great! I guess it is true that a little good fresh vanilla goes a long way. One person who tried this suggested that it would be an award winner in competition.
  • The Bourboned Oak Oatmeal Stout was good yet more subtle. Hints of both Wild Turkey and oak were present in the aroma, and a little bit more present in the taste. But this wasn’t one of those ‘Would you like some stout with your bourbon sir?’ kind of bourbon stouts. I actually can’t wait until I have a chance to blend a bottle of this and the vanilla stout together – give this an extra boost and mellow out the vanilla, together with them already being complimentary flavors – nice!
  • The Coffee Oatmeal Stout was originally dubbed the ‘Breakfast Stout’, but I think it would have been better dubbed the ‘Old Percolator Stout’. It both smelt and tasted of cold old coffee, a little different that I had planned. I was hoping for something along the lines of FC Espresso Stout or Peche Mortel, oh well. It isn’t bad, but I bet it is the last of the stouts that are finished.
  • And the Cocoa Pebble Oatmeal Stout. Well, … I honestly had low expectations for this stout from the get go, so I wasn’t disappointed. When the cap was cracked I took the precaution of opening it over the sink (reminiscent of the ol’ Fall run of FC 2001). This one was a gusher, but I’ve had my training and knew the proper thing to do was pour into the glass immediately to help relieve the pressure. The beer had an odd brown film on the top reminiscent of the scum you may skim off the top of a home-made soup, yum. The smell too was of, sweet alcohol? It was weird to say the least. And the taste? Not Cocoa Pebbles, that’s for sure. I can’t really describe it besides sharp and biting – I also only took two sips, a braver man than some.

Stout 1

Originally I started this whole experiment just to try and make a pre-sweetened cereal beer for a specific category for a specific contest, but didn’t want to “waste” a whole batch by mashing with the cereal just in case it flopped. Well, the one I was trying to have come out did flop. I actually drain-poured the other 6 Cocoa Pebble Oatmeal Stouts, trust me, you aren’t missing anything.