Archive for the ‘Homebrew’ Category

War of the Worts XIV

Sunday, February 22nd, 2009

Yesterday, February 21, 2009, was the War of the Worts XIV homebrew competition in North Wales, PA.

wow-web

I was able to judge this event yesterday but not able to participate. I’m a slacker when it comes time to signing up for these things so I always seem to miss the deadlines of when the entries are due. Typically they will allow judges to bring their entries day of the event, but the trick to that is that all of their paperwork has to be received prior to the deadline, oh well.

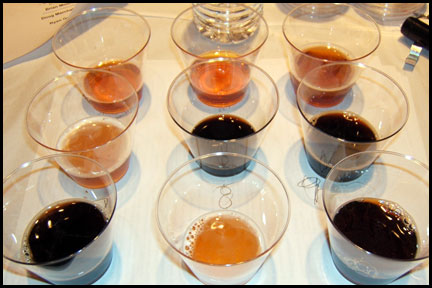
So in the morning I judged Spice/Herb/Vegetable beers which a lot of people do not like to do. I actually prefer to judge the S/H/V, Fruit, or Specialty categories because there is so much diversity in each category and I never know when I’ll try a beer that may inspire. For example, last competition I tried a great Chocolate Mint beer that I was absolutely surprised that it worked and this time I tried a beer labeled as a Sweet Habanero beer which is a total contradiction – but somehow he made it work. We had 27 beers and 7 judges in the morning, so we broke it out that each pair of judges (actually 2/2/3) would do about 9 beers. After that each pair picked their top 3 beers and they moved on to a mini-best of show round for that category, you can see the results in the picture above. I’d say we roughly had 3 coffee type beers, 3 pumpkin type beers, 2 chocolate type beers, and a spicy one. The winners were a Chocolate Hazelnut for first, and two different coffee beers for second and third.

Later in the afternoon I judged Strong Beers Table 1. What the hell is that? Basically there were so many entries (over 500) that some of the table groupings weren’t BJCP categories per se but groups of beers that could be judged for what they are (ie an Imperial Stout is still judged as an Imperial Stout) but would still make sense to be grouped together. We had 20 beers and 4 judges in the afternoon, so roughly 10 beers per pair. Fortunately the table had 10 Imperial Stouts, 7 Imperial IPAs, and 3 American Barelywines. I was on the IIPA and B-wines. Right out of the gate we had like 3 great IIPAs so I was stoked, it’s a category with a wide range that a lot of people just kind of muddy up. When we finished our 10 the other 2 judges still had 4 beers left so we hopped in and did 2 Imp Stouts too. Afterward there was another mini-best of show with 4 Imp Stouts and 3 IIPAs moving on. The winners were an IIPA for first (the first beer we drank that afternoon), an Imp Stout for second (one of the two we judged), and another Imp Stout for third.

All in all it was a good afternoon that ran smoothly, but started to run a little long. The awards ceremony was supposed to be at 5PM, they were just starting the official Best of Show judging at 5PM which can take up to an hour easily. Oh, this year they had it in a new location too. Previously it was at the Iron Hill in North Wales, this year it was in an empty store in the same location with the awards at IH. This worked out really well – we had all the space we needed and there were not any interruptions. On the down side (nothing major) the heat was very weak in the store we were in and lunch wasn’t as “nice” as when we are actually at a restaurant location, but we all lived. You can check out all the results here.
New Ingredients

Saturday, February 21st, 2009

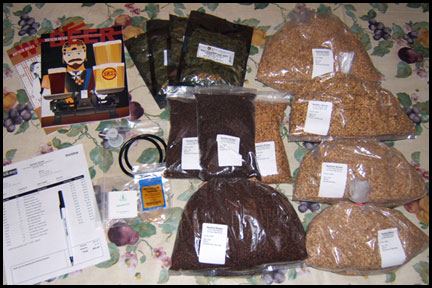
So I ordered, and received some new ingredients, and I can’t wait to get behind the mash paddle again!

new-grains

So I ordered from Northern Brewer again, whom I have been quite happy with recently. Two of my biggest complaints with the other major online company I was using was the delay between order placed and order in hand, up to and over 10 days, and almost always something small was messed up or forgotten. With Northern Brewer it is typically less than 5 days and usually they accidentally include “extra”. For example, this time I ordered two gaskets for the internal parts of the quick disconnects, I received four instead, cool.

I got ingredients to make a few new batches, many of which were on my mind for this Spring to drink, but I guess they’ll be good whenever. The main batch is going to be a split 30 gallon batch of Scottish 70/- Garrett and I are to brew next weekend, should be fun. I also order stuff in to make an American Brown Ale, another Pale Ale, an Irish Red, and an Oatmeal “Cookie” Stout. Realistically all of these will be ready to drink by Summer. I guess these should have been more American Wheat’s, and Hefe’s, and Saison’s – oh well – I’ll drink anything.

What’s On Tap?

Sunday, February 15th, 2009

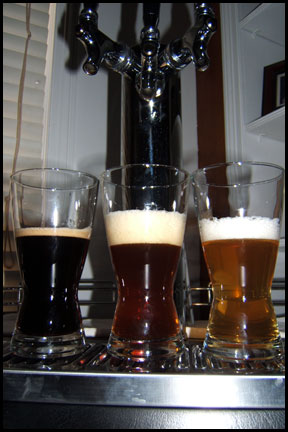
So, what’s on tap? I thought you’d never ask!

whats-on-tap

So right now I have the following beers flowing: an American Stout, a California Red, and a Pale Ale. The stout is very much like your “typical” brewpub stout, hoppy and bitter with the roast to follow, pretty drinkable. The red is both a little sweet and a lot hoppy and way in your face in that good way. The pale is super mild, on purpose. I purposefully avoided C-hops and didn’t dry hop, so this beer is a little earthy, a little mellow – but totally drinkable. Just thought I’d tease you all a little, enjoy!

New Beer Books

Tuesday, January 13th, 2009

I know it’s a little after the fact, but hey, I’m a little slow – and you can take that to mean whatever you like!

books-web

Actually, come to think of it, I received two of these for my birthday, so I’m really slow. But I did have a similar post last year, and it was even later, so there. Anyway, this is the new stash:

I’m actually really stoked to read all of these and these are all books I’ve wanted for a while now. The biggest problem with getting this many new books on “one” subject is there is a certain burn-out factor. It’s not like these are stories, they’re generally more like little volumes of massive amount of information with random stories/background thrown in. Very useful and informative, but not a book you burn through. All the same, they make great reference material when trying to tackle a new beer or better an older recipe.

Bottling & Modifying

Saturday, January 10th, 2009

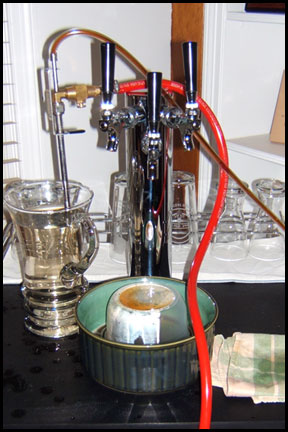
So this afternoon I got to give a little bit of love to the kegerator; bottled a case of beer, and fed it a new keg.

bottling-web

Basically the objective was to kick the Gnarleywine keg as soon as I could. Not that it was a bad beer, I was just ready to move on from it, and I really needed some hops in my life. So I set up all the bottling equipment and cleaned and sanitized a case of bottles. I first pulled of six Cream Ales into bottles, then six Chocolate Porters, and finally eleven Gnarleywines, it kicked on the twelfth bottle – which I drank. This way I now have a couple bottles of each brew to tuck back fro the annual Fool Circle beer tasting, plus possibly an early competition like the War of the Worts in February.

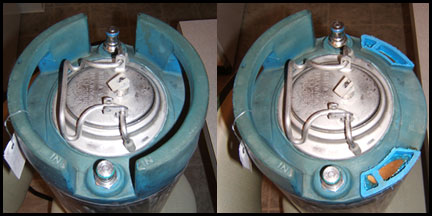
keg-modification

After I was through bottling I pulled the Gnarleywine keg, which was a half keg, 2.5 gallons. Now I had to try and fit three full sized kegs into the kegerator when I knew they weren’t going to fit. I tried anyway though. I brought up the keg of Keg-Hopped Imperial Amber Ale that Garrett and I brewed a while back, October I believe. So I tried to shove all three kegs in, no bueno. The compressor in the back of the fridge hangs down just low enough that the handle on the third keg just won’t fit, by less than an inch. So I took a note from Frey-Guy and thought, WWGD? I went out to the garage and grabbed the hack-saw and got rid of the handle on the keg. I gave it another go, and I was able to squeeze in all three kegs. The half keg actually would sit back even further giving the illusion that there was more room than I had anticipated. Overall, success.

whats-on-tap

So, what’s on tap right now? Well we have my Chocolate Porter, the Keg-Hopped Imperial Amber Ale, and a Cream Ale. The Chocolate Porter was brewed with 8oz. of Cocao Nibs and turned out very lushy chocolaty, like baker’s chocolate, dark brownies, and coffee mixed together – I dig it a lot. The Cream Ale has been a crowd favorite, dry yet sweet, smooth yet bubbly – it’s a very easy drinker in my opinion. And the KHIAA I have not “really” tried yet, it still needs to cool down in the kegerator and probably settle a bit. I’ll keep you posted on what I think.

I Have Gas

Friday, January 9th, 2009

Yup, I have gas, and lots of it too!

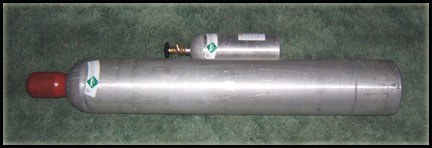
gas

It’s kind of a weird picture, but hey, it works. Basically I just scored a third gas tank, for “free”. It is a sweet 50# aluminum tank. So now I have a 5# aluminum, a 20# steel, and a 50# aluminum tank. The two aluminium’s I own and the steel is on permanent borrow/exchange with the gas company.

I scored the 50# tank at work, it was empty and they were going to throw it out and I was like “can I have that?” And they said sure! So I took it to G&E Welding to get it filled. They admired my tank which I thought was funny (“man, that’s a really nice aluminum tank, man, where didja get that nice aluminum tank, man, I’d hold on to that aluminum tank if I were you” – it was too funny), and then told me it was going to be $25 to fill. Good deal I thought, my 5# tank is normally $10 to fill, so for another $15 I was going to get 10x the gas. Then he started looking at it and realized that the tank was out of date. Basically every 5 years the tanks have to get tested to make sure they can still hold the pressure from the gas. He said to get it pressure tested and stamped was going to be like $50, fine whatever. Then I get a call after they have had it for like a week, “man, what kind of gas was in here?” I told them I didn’t know. Basically the nozzle was fitted for a different kind of regulator than a CO2 regulator, so they were going to have to change out the nozzle too, another $50. So as of now my “free” tank was going to cost $125 – ouch.

When I went to pick up the tank, after quite a while waiting for it, I brought my empty 5# tank with me. They did charge me the $125 for the 50# tank total, but filled the 5# tank for free and threw in some nylon regulator gaskets. I was a little perturbed with the wait, but overall good results. I then realized how heavy a full 50# aluminum tank was, almost a 100 lbs., so I was glad it wasn’t steel.

After I got home I did some research and found out that a new 50# aluminum tank costs around $300 depending on where you go, some less, some more. So my “free” tank was actually a pretty good deal, though I put out a lot more money for it than I had originally anticipated. I was hoping I was going to be able to use the 50# tank to fill my 5# and 20#, and basically use the 50# as like a storage tank. I asked the guy at the shop about that and he basically said it is possible, but that I wasn’t really set-up for it, something about tubes being put inside the tanks and liquid CO2. I figured I might try anyway, they do have pressure relief valves on them. Who knows.

Fermentation Makes it Happen

Monday, January 5th, 2009

Do you ever like going to check on a beer and it looks like this?

american-stout-web

Of course not, no one does. There is a total; where’s the airlock? Who’s going to clean-up the wall? Look at the cover!? What happened? Well at least it’s fermenting well – kind of moment.

You know it was a lousy day at work when coming home to see this and it was the best part of your day. Awesome.

American Stout

Saturday, January 3rd, 2009

So today I brewed for the first time in about a month, and the first time for 2009!

stout-web

Normally I am all ‘it was an uneventful brew day, blah, blah, blah’. Well, today was different, it wasn’t quite eventful, but it wasn’t smooth either. Let me try to go through some of my simple mishaps that helped turn the day into a “ooph”.

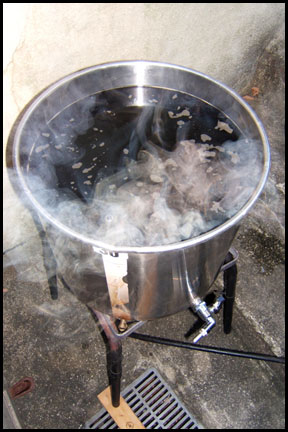
I do not know what I was thinking when I made this recipe a few months ago before I placed an order for new ingredients, but I turned up short in more than one way. First, while I was measuring my grains I was a 1/2 pound short on roasted barley. I’m sure the beer will be fine, but I was actually planning on making two stouts – um…hello! Next when I went to go grind the grains I was dumping them out of a bag into the mill hopper and the bag split dumping about a 1/4 pound or so of grain everywhere, awesome! After I was done messing with the grains and cleaning up I realized I had overheated my mash-in water by about 20 degrees, great. Then, after I mashed-in I realized that I used the wrong scenario to calculate the water – I used 1.25 qts in stead of 1.0 – oh well, it’ll be fine, I’ve got the room. Then when it was time to add the first addition of hops, I didn’t have enough or the right kind of hops – what was I thinking…? So I made a substitute on the fly, hopefully not messing up any other pre-planned recipes – Chinook for Horizon for bittering and Cascade for Centennial for late addition. Then when I was trying to be a good-little-brewer and clean-up as I go I blew a water line hooked up to the faucet and almost shit my pants! Seriously, I didn’t know what happened and it was loud, hot, and wet all of a sudden. I was actually cleaning out a keg and thought somehow the keg had blown, dunno, but that’s where my mind went. And finally, I ran out of propane, and my back-up was empty. Fortunately it was with only 2 minutes left in the boil, but with maybe 15 minutes left I knew we were heading in that direction, with my rapid rolling boil turning into a just barely boil before the gas blew.

It was kind of a crappy brew day for little shit happening, but overall I am REALLY glad I brewed today, it is one of the few things I wanted to do over my break from work, and it almost didn’t happen. I also hit my OG and my volume and finished up in about 5 and a half hours, so that’s the all-good out look for the long run. I think I may bourbonize this beer in the secondary, but I haven’t committed yet.

Oh, BTW, to any homebrewers who read this, I hit a paranoia moment today while cleaning glass carboys. I typically do a hot water rinse, followed by a PBW hot water rest of at least 24 hours, followed by two hot water rinses, followed by either Iodophor or Star San as a sanitizer – but every once in a while I don’t think it’s enough. So my question is, what do you all do? Do you have some sort of secret chemical you swear by? Lemme know, I’d appreciate it.

Tower Conversion 2

Thursday, December 11th, 2008

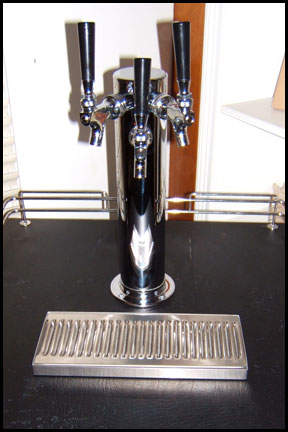
So today I finished my tower conversion, from one faucet to three!

So this took a little longer to finish than anticipated, but it wasn’t because of the kegerator. Sunday is when I began the project, regular life stuff stifled me on Monday, video games at a friends house overwhelmed me Tuesday, but today, Wednesday, I succeeded in a great mission. The greater, pseudo dream fulfilling mission was acquiring the kegerator in the first place, but now pimping it out to a three faucet tower in my own home – – Sha-weet!

So a couple points of preparation. First I wanted to fill the gap between the bottom of the particle board and the top of the metal. This is where there appeared to be a 2″x2″ piece of 2″ foam. I acquired a 4″x4″ piece of 2″ foam. I then proceeded to drill out the middle of the foam to match the rest of the hole in the top of the kegerator. I really had to squeeze to make it fit, but once it was in it was a nice tight fit.

I also, wanted some sort of liner in the new hole I drilled. Originally I pictured PVC pipe, but they do not make PVC in a 2.5″ OD. I bought a small piece anyway, but after taking some measurements at home, I decided I would loose an additional .5″, thus really only opening the hole .5″ which didn’t seem like it was worth all the effort. What I compromised on was a small collar toward the internal side of the kegerator. Basically I took a desk grommet and punched out the top. I then cut out a .25″ section to make it fit my diameter. It worked perfectly. Now there is a smooth edge for the draft tubing to rub against before entering the hole.

I had to re-line-up the holes for the new tower too since it was wider. First I placed the gasket down and marker where the holes would be. Then I placed the tower on top to make sure it matched the gasket, it did not. Two of the holes did, I had to remark the other two holes. It was funny, the tower came with screws to mount it that were like 3″ long, but the particle board it had to go through was only like .75″ long. Fortunately there is that gap where I put the foam where the screws are just hanging.

So I had already planned on what the first three beverages were going to be. I knew one was going to be the return of the Gnarleywine, my 2006 Barleywine that had carbonation issues. I also put on the traditional and sweetened Ciders, not because anyone needs that much cider, but it’s that time of the year. I think tomorrow, Traditional Cider with shots of ButterShots in it, yum!

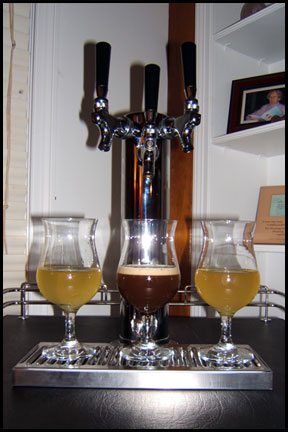
There’s a picture of the first three pours. Or should I say proper pours. I was have issues with the faucet on the right for a good 30 minutes. Every time the liquid line was attached I couldn’t get the cider to stop pouring. Eventually the culprit turned out to be the ‘collar’ on the faucet (below the handle) was not tight enough, thus the seal was not properly set. All in all I would give this a very positive experience in the world of homebrewing.

Tower Conversion 1

Monday, December 8th, 2008

So today I began my tower conversion on my kegerator, from one faucet to three!

I have been putting this off since I purchased the thing back in July, so five months. Why the procrastination? Well, I was pretty sure I wanted to widen the access hole in the top of the kegerator to allow more cold air into the tower to keep the beer lines cold, but I was basically a little hesitant about drilling big holes into my new expensive toy. But, finally, the time had come and I was ready (almost) to leap.

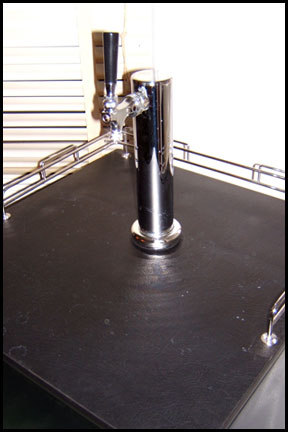
First I needed to prepare. I unplugged the kegerator and took out the two kegs of cider from inside. I then wiped up any moisture from inside. I removed the factory supplied tower easier than I had installed it, but I guess that that’s what happens when you don’t have to force the screws in. Next I put tape around the hole so that I could draw my mark on where to drill. After drawing my first mark and realizing it was off-center, I grabbed a tape measure and redrew my mark more centered.

The next problem was going to be with the tool/method I had chosen to go with. I decided a hole-saw drill bit would be the best solution, but the way these operate is to drill into something (wood for example) and then the drill helps guide and pull the hole-saw through the material. My problem was with the original kegerator hole already there, there was nothing for the bit to bite into. I knew if I could get it started though I’d be OK. So I made a couple poor attempts to get it started and scratched up the laminate surface of the kegerator, but only a little and only right by the hole. I eventually got a bite and really had to lean on the hole-saw for it to go through the particle-board. After the particle-board was some foam, the saw ate right through that, then a sheet of metal.

I think it was stainless steel though I was hopeing it was aluminum. Why do I think stainless steel? Well, the hole-saw couldn’t get a bite (again) and was making things very hot. Well the hotter you get stainless (in this type of scenario) the harder it gets, go I was getting no where fast. I actually set the insulation below the metal on fire, that’s how hot it got. First it started smoking, then sparking, then then next thing I knew I was blowing out a small flame – yikes! To get through the metal I basically had to take a screwdriver and a hammer and chisel/can-opener style make a hole, it was ridiculous. The hole-saw had left a pretty good impression of where the hole should be so I just follow that around with the tip of a flat head screw driver and pounded the heel with a hammer – suckage.

After the metal was insulation (slightly burnt) and then the actual plastic lining of the kegerator, both of these layers were like butter. So basically it was tough to get started and tough to get through the metal half way through, but all in all not to bad. So I wound up widening the hole for the beer lines from 1.5″ to 2.5″. It doesn’t sound like a lot, but I hope it makes a difference. The diameter of the actual new tower is three inches, but there is a layer of foam insulation inside the tower which makes it two and a half, so that’s the measurement I aimed for. Oh, and no coolant lines in the ceiling of the kegerator, which I was worried about.

The main reason I stopped tonight was, one it was getting late, but more importantly is I need to do a minor replacement before I put the new tower back on. The layer of foam below the particle-board and above the metal was only about a 2″x2″ block, so when I drilled through it there wasn’t much left. This then left a two inch gap between the particle-board and metal area of the kegerator, I can only image that would be counter productive of trying to provide coolness.

So tomorrow (hopefully) I will replace the foam layer with a new foam block, cut off the commercial keg connections on the tower beverage lines, drill new holes for the new tower, mount the new tower, connect new liquid quick-disconnects to the the beverage lines, and enjoy a couple beverages. It sounds like it should go quickly, but I know it will take more time than I realize. I turned the kegerator back on to make sure it cools and I didn’t damage anything, I stuffed a towel in the new hole. Also I was hoping to enjoy a couple cold beverages tomorrow, my Traditional Cider, Sweet Cider, and the return of the Gnarleywine.

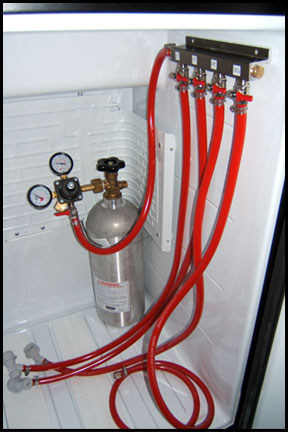
Since I was messing around in the kegerator making improvements I also mounted my gas manifold. This has been rolling around in the bottom of my kegerator since the beginning. I was tempted to drill it into the side of it, but instead I opted for industrial strength Velro, hopefully it holds. I think it’ll fall within the first 24 hours, or not at all, we’ll see. Until tomorrow!