Archive for the ‘Homebrew’ Category

Hard Cider

Thursday, October 16th, 2008

On Monday (10.13.08) I made two 5 gallon batches of hard cider, I am very excited about these!

So I try to make a batch of hard cider every year, which translates to twice in the last three years, oh well. Anyway, on Saturday Karen and I went out to Linvilla Orchards and picked up the cider, ten 1 gallon jugs, about $50 worth of cider. I figured that wasn’t too bad, though I would have liked it if they had a larger quantity option. I had previously contacted them about getting a custom blend of apples, or getting the cider right off the press, or any other suggestions that could make the cider fresher / more unique, but they said ever since the barn burnt down (which had their press in it) they ship their apples out to get pressed and the cider they have is the only cider available.

The original plan was for me to take the cider home, let it sit out at room temperature for about 24 hours (until it came up to temperature) then make the cider. Well, things change. Instead Robert and I contacted each other and punted. We had talked about camping on Saturday down in Sussex County and then running all of the Sussex County Trail Challenge, about 13 miles over five trails. This idea had kind of slipped through the cracks until about mid-day Saturday when suddenly we both were like “do you want to?” So basically we scrambled to throw together our camping gear, get food, and try to find a camp site with availability. The first two campgrounds we called were already booked, but the third was the charm, and we stayed at DE Seashore State Park on the Indian River Inlet. We drank some good beers Saturday night, Samuel Smith’s Taddy Porter and Oatmeal Stout, and a Hoppin’ Frog B.O.R.I.S. the Crusher Russian Imperial Stout.

Linvilla Cider 2Sunday came bright and early and we almost didn’t get to have coffee, ran out of fuel for the camp stove right before it came to a boil and there was a no open fires rule at this campground. The runs went OK, our favorite run we got turned around on since they had changed the trail, and the two we were dreading the most went fine, go figure. Since we were already down in the area, we took advantage of the fact that we could go to Dogfish Head. So we had a couple reward beers and a sandwich, then I saw something I hadn’t seen before. Floating behind the bar were a couple unidentified unadvertised bottles of beer. I inquired and it turned out to be two special beers, both $20, both had to be drunk in house – drat. One was a beer Sam had brewed with a Danish brewer called Odense Old Style Ale brewed at Nørrebro Bryghus in Copenhagen, the other was a beer Sam had brewed with a group of US brewers called Isabelle Proximus brewed at Port Brewing. We had the Isabelle, an American Wild Ale, and it was ridiculous, I am so glad we bought a bottle, very difficult beer to find. If you are interested in obscure beers / beer adventures I would highly recommend the links to these two beers, cool stories.

Linvilla Cider 3
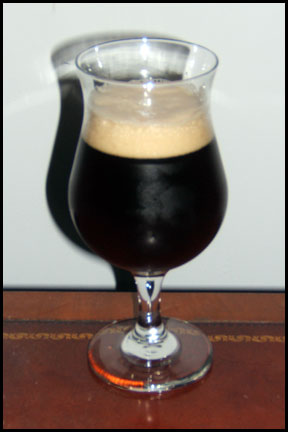
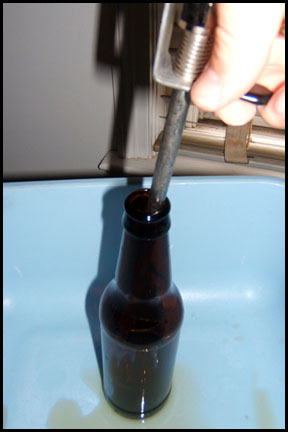
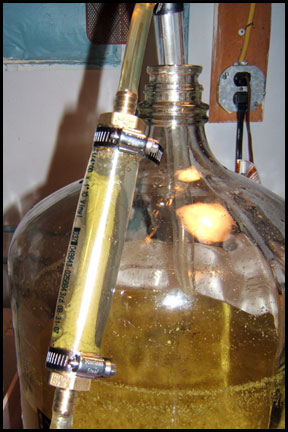
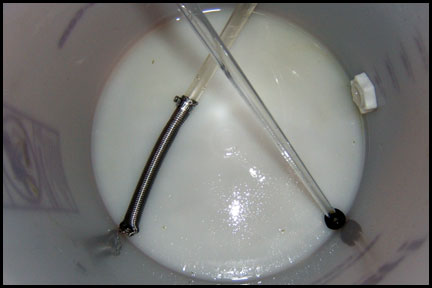
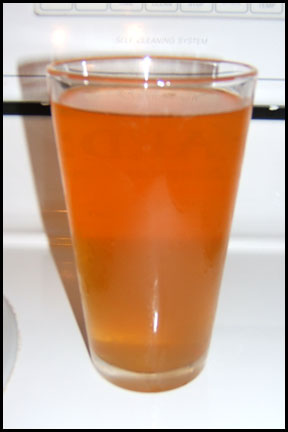
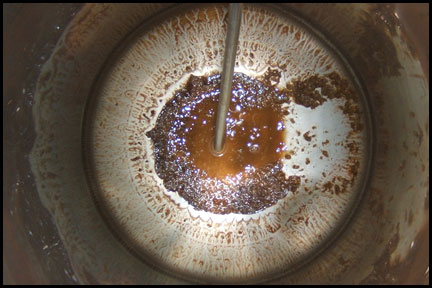
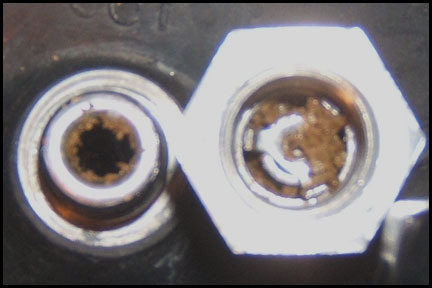
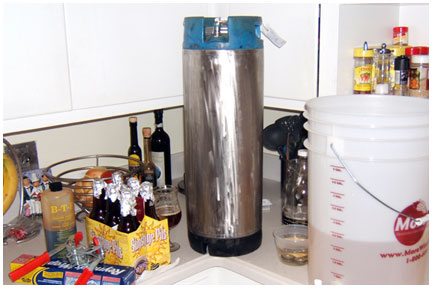
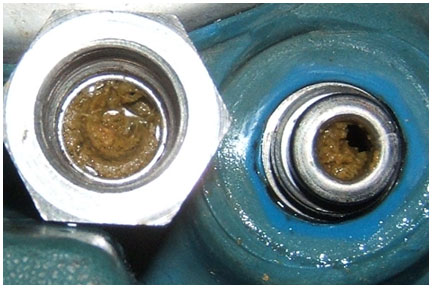
So by the time I got home on Sunday I was completely wiped and the cider still had not been made. I checked all the bottles and the cider did not seem to begin spontaneously fermenting so I figured I had time. I honestly didn’t get to the cider until Monday night at about 11PM, so they had been sitting out at room temperature something like 58 hours! I was kind of nervous that I had just blown the cider experiment and wasted a bunch of money, but as I was taking original gravity readings out of the jugs I tasted most of the cider and smelt all of it and it seemed fine, I was relived. I make a very simple cider recipe: five gallons fresh apple cider, 1 Tbsp yeast nutrient, and 1 pack/vial of yeast – that’s it. This time I used S-33 a Belgian-style yeast in one batch and US-05 an American-style yeast in the other. In the past I have had some carbonation issues, but theoretically it should be a non-issue this time, either kegging it or kegging it and force carbonating the bottles. The plan this time is to keep one cider “traditional” and to back-sweeten the other cider to make it more like a cider-pop American style, like Woodchuck or something. So far the fermentation has been very vigorous, to the point that I have been running them as “open fermentations”. Well, not full-on, but I removed the air-locks from the carboys and just covered the openings loosely with aluminum foil. Why? Well, Tuesday morning I cam down to check on the ciders and there was “apple sauce” inside the air locks, so I figured I’d try to give them a little extra breathing room. I’m really not to worried about it.

Bottling for Competition

Monday, September 29th, 2008

So the other day I decided to break out the Beer Gun again and squeeze off a few bottles to put aside for some up coming competitions.

This time it was the Abbey Ale which I will be entering as a Dubbel, this beer turned out really well so I hope that it gets the same kind of reception. I must say though, that bottling went smoother this time than last. For one I was more confident since last time was the first time. But more so than that, I had all the right pieces this time.

Last time for some reason the CO2 didn’t seem to “work” right. I knew it was on, I knew there was pressure in the line, but for some reason it just didn’t exit the Beer Gun they way I imagined it. It turns out the piece I bought that connects from the gas swivel nut to the Beer Gun body (the piece behind the tap handle in the picture of course) was wrong. I bought a one way gas valve which allowed the gas to go in only one direction, the wrong direction. I later replaced that part with the same part but with one that didn’t have a valve and things worked out fine. Hey, it looked right, it just worked like shit.

So from what I can tell there are three local homebrew competitions coming up. Both the HOPS BOPS (24th year) and the Lancaster Homebrew Competition (1st year) are on October 18th, and about a month later is the Split Rock competition on November 22nd. I will probably enter the Abbey Ale into all three. I should look into judging at the HOPS BOPS, I haven’t judged much this year and it would be good practice.

Abbey Ale

Monday, September 15th, 2008

So quite some time ago I brewed a beer I dubbed the Abbey Ale, it was actually the first beer I kegged for the kegerator, now it’s on tap.

Abbey Ale

This was kind of an off-the-cuff / tribute to Ommegang beer. I had brewed a Tripel and a Dubbel back to back so I was kind of in a Belgian mood, plus I had just worked through most of the beers from volunteering at Ommegang so I was in an Ommegang kind of mood too. This beer was suppose to be reddish in hue and closer to Ommegang’s Abbey Ale than anything else. Well, it turned out very much like Ommegang’s Abbey Ale and very much like a Dubbel, probably more so than my Dubbel did.

When I first tapped this Thursday night without all of the above explanations Robert said it reminded him of Ommegang’s Abbey Ale. So what do I have to do, run down stairs and grab one and do a side-by-side. My beer was colder, less carbonated, and a little sweeter. Their beer had been stored at cellar temperatures, was bottle-conditioned and fuzzy, and more dry than mine. But over all two great beers.

Scarily enough, this was the first beer I kegged for the kegerator and the last full keg I have being put on. Guess who seriously needs to brew some beer? Fortunately I do have three beers in carboys ready to go.

Gnarleywine, revisited

Sunday, September 14th, 2008

So today I worked on a small project that I have been putting off for quite some time, like over a year.

Gnarleywine keg

Back in October of 2006 Garrett and I brewed a 10 gallon batch of American Barleywine called the Gnarleywine. The brew day was long, the grain bill was large, and we used a ridiculous amount of hops. But between the high alcohol content and the extended time in secondary, this beer NEVER carbonated. I probably could have added some bottling yeast to achieve carbonation through bottle-conditioning, but I didn’t.

So, Garrett let me borrow a 3 gallon keg he has so that I could play with the Gnarleywine to see what I could do. Initially we had thought about reverse-counter-pressure filling in the sense of sending the beer from the bottles to the keg under pressure in a closed environment, carbonating it in the keg, and then filling the bottles with the counter-pressure filler. Seemed like a lot of work to me. So instead I basically cleaned and sanitized the keg then slowly poured the bottles down the side of the keg under a blanket of CO2. I’m sure I oxidized the piss out of the beer even though I was being very careful, but better to have a chance to drink it under better conditions than not at all. I also added a small amount of vodka infused with Madagascar vanilla bean and Wild Turkey bourbon that had been steeped on oak chips. Why not try and make a whole new beer out of it? I was contemplating putting some hop pellets in a bag in the keg, but with my luck with hops and kegs I decided to avoid it.

Plastic diptube smSo right now the keg is carbonating. I haven’t decided if I am going to leave it in the keg and put it on tap or if I am going to use the Beer Gun and bottle it. It’ll partially depend on if Garrett needs the keg back (sorry I’ve had it so long). A weird thing about this keg was it had this weird little plastic dip tube on the gas side. I had never seen anything like this before. I’m sure it works fine, I’ve just never seen anything like it. It’s funny, I really like these small “half batch” size kegs, but they are expensive and rare. Usually most places don’t have them, and the ones that do they sell for around $100 used, ouch!

6th Annual Fool Circle Beer Tasting

Tuesday, September 2nd, 2008

This time it was 14 months in between tastings, but we still held the 6th Annual Fool Circle Beer Tasting last Saturday the 3oth of August over Labor Day weekend, and everyone could make it.

6th Annual Fool Circle Beer Tasting

So, this years tasting was later than usual because of the saga of the kegerator. I had eight kegs worth of beer that would normally have been available for the tasting and I was trying to figure out all the logistics of how to do this. In the long run a few of the beers were drunk before the tasting and a few were filled with the Beer Gun. All in all we still had 20 beers (the most yet) to taste so I don’t think anyone was complaining.

This year we did the blind side by side tasting style again, which I think has become the new norm. I also declared right off the bat that I was not aloud to win, even if I got all of them right (which I didn’t), which was last years stipulation. This year we had four vintage brews from 2004-2006 plus the others from late 2007 and early 2008. Some stand-outs that I remember were the Saison, developed beautifully, the ABA, held up great for a great beer, the Vader, awesome, and the Honey Oatmeal Stout, still tasting fresh. A lot of the Ambers, Pale Ales, and Golds got muddled together for me with all of their hop presence being weakened with age.

In the long run the overall break-down went like this: Richard with a big 3 correct, Todd with 5 correct, Dave and Karen with 6, Robert with a huge 10, and Brian (me) with a non-counting 17 out of 20 correct. Richard did well at telling honey from apples from barley, Todd, Dave and Karen all did about the same, Robert did well with 50% correct mostly mixing up the browns with the browns and the pales with the pales, and I got 3 wrong, the Amarillo Amber, the Fool’s Gold, and the Pacific Gem Pale Ale. Robert walked with the big title though and was crowned the Grand Pooh-Bah until next year. He took the trophy base home to get engraved and hold onto, but left the Grand Pooh-Bah glass at my house to drink out of in front of me for the year, thanks sucka!

After the tasting I fired up the grill and got dinner started earlier than last year. This year I kept it simple with burgers, potato salad, baked beans, corn on the cob, and potato chips – simple summer BBQ style. Before and after dinner we played some Cornhole. Todd got full on food and drank too much and began “rubbing feet” a little early and dipped out around 9ish half asleep. Richard hung a little longer, but unfortunately had to work the next day so he couldn’t stay too long. Karen hung and played Cornhole and stuff until about midnight, but then she wised up and went to bed. But Robert, Dave, and I fool-asses stayed up to almost 3AM bull-shittin’, drinkin’, and getting ate up by mosquitoes. It was great.

If you’d like to check out last years post (2007) feel free to check it out, and that then will direct you to all the other Fool Circle Beer Tastings from the past. Plus if you’d like to see the rest of the pictures from this years tasting I have embedded a slide show below, but it can also take you to the full photo album. I also am going to include some of our more colorful quotes. No offense Dave, but even your good handwriting isn’t good.


  • “That’s fuckin’ with the Monkey”
  • “Don’t use your doctor handwriting”
  • “I got one right Fuck-Face!”
  • “Weigh my balls in it . . . That’s a stout”
  • “I wouldn’t even wait until I was starving to eat someone”
  • “Is there a part of the pig that isn’t delicious?”
  • “That smells whoopity”
  • “Hey, that’s our fucking cheese!”
  • “Gotta love the bottle ass”
  • “Fun-of-a-bitch!”
  • “I’m like Hazel and Gretal in the fucking woods”
  • “Richard pig noise”
  • “Take this cheese from me”
  • “10 is funky, like Bootsy Collins funky”
  • “He could have done it with his ass”
  • “Like it’s the first time I have tasted Richard’s vomit”
  • “You didn’t pick a 19 asshole!”
  • “I don’t want the mayonnaise jar back”
  • “We’re back to pig again…”
  • “I would have sex with this beer”
  • “Richard can tell the difference between apples and beer”
  • “Dude, you don’t have a 19 either!”

Blichmann Beer Gun

Friday, August 29th, 2008

OK, so I’ve had the Blichman Beer Gun for almost two months now and I haven’t played with it yet, guess what, I just did!

Blichmann Beer Gun 1

Dude, the Beer Gun is way cool. The first time I tried to use it I hadn’t checked how much beer was left in the keg and basically kicked the keg trying to use the Beer Gun on the first bottle, no good. So this time I was feeling more confident and actually had two kegs lined up ready to go. I was going to bottle a six pack each of the Amber Ale and the Pacific Gem Pale Ale. I hadn’t even tapped the keg for the PGPA, and with the keg issues I have been having, that is almost being cocky.

Above you can see my basic set-up mostly hooked up. So essentially it worked like this. Turn the gas pressure down to half the serving pressure, so for me that is about 5 PSI. Then purge the gas from the head space on the keg and hook up the gas at the lower setting to the keg and let it equalize. With a second gas line (turned off) hook that up to the beer gun. Hook a ten foot section of beverage line up to the Beer Gun, then to the keg, then turn the gas on to the Beer Gun. Essentially your ready to go. I flushed the air out of the CO2 line, then pulled on the beer until no foamy beer was coming out, a couple ounces. I then got ready with the first bottle and held my breath.

Blichmann Beer Gun 2Dude, no problems. Basically you insert the Beer Gun into the bottle, pull on the gas button for a couple seconds to flush the bottle with CO2 then pull on the beer lever for maybe 20 seconds and you have a full bottle of beer. I let the foam rise up and over the opening of the top of the bottle, then pulled out the beer gun which left the perfect amount of head space and then hit the head space again with CO2 to blanket the beer. Then I quickly grabbed a cap and capped the beer. It seemed almost too easy. Pretty fast, not to messy or too wasteful, and I knew the carbonation was controlled – shaweet! So I went through six bottles of the Amber then six bottles of the Pacific Gem in this manner with no issue. I then filled a growler of the Pacific Gem too since the Amber is on tap, I can then enjoy the Pacific Gem now too.

I was thinking of messing with the three tap tower I have and hooking that up, but honestly lately I have been thinking of contacting the company I bought it from and possibly doing an exchange for a two tap tower. Sure it’s cooler to have three taps and more variety, but I don’t know, two just seems like it may work really well. We’ll see.

Hop Filter Experiment

Monday, August 25th, 2008

So as anyone who reads this knows I have been having some issues with my kegs becoming clogged which appears to be from hop debris getting stuck in the liquid out post of the keg.

Hop Filter 4

So, I have determined that my racking technique is poor and could use some attention. The obvious way is to be more careful and more discriminant in my racking. This I can work on. But, I was also interested in possibly adding some sort of course filtration system to my racking system to double insure that I will rack only clear beer. My initial idea was for an in-line filtration system. I imagined some sort of filter on the out-going hose between the carboy and the keg. I also thought about the same idea but instead located at the input location of the racking cane or at the output location of the hose from the racking cane.

While on lunch one day I daydreamed a sketch for the inline version of the hop filter. It seemed to make sense, my biggest questions were what to use as the filtration material and how long should it be. I decided on using a stainless-steel braid butchered from a water line. I have heard of people using these for straining out a grain bed in a mash tun with great success. Then I decided to make it about six inches long just to help avoid any weight issues since the contraption was made out of stainless steel, rubber, and brass.

The parts were easy enough to find, though I would have rathered everything was stainless steel, but the brass was NSF rated and it was really just a proto-type at this point. I bought all the parts and threw it together in about 30 minutes. Next I added 1.5oz of pellet hops to a glass carboy with 5 gallons of water. I had to let the hops “dissolve” so that they were no longer pellets and were more of a particulate. I was amazed how much hop debris was in the water, it was literally green. I can only imagine what it looked like when I brewed my Pliny the Elder clone and it had about 6oz of dry hops in it. I also realize that under normal circumstances the hops would have settled for a week plus, but I really wanted to test the filter under a worse case scenario type of atmosphere. So after all the hops had “dissolved” the experiments began.

Hop Filter 6 Hop Filter 1 Hop Filter 5   

First (Experiment #1) I tried the in-line filter. This is really the one I wanted to work because I like the way it worked and it was the most expensive and time consuming to work on (though it wasn’t really expensive nor time consuming). So I hooked the filter up basically right off of the racking cane. At first, because of the size of the tubing used on the filter (1 inch inner diameter), the chamber would not fill with beer, thus the suction for the racking would not occur. Not that I would want to do this with beer, but I “pumped” the Auto-siphon a few times and things got moving. I figured I was initially testing its filtration capabilities and the efficiency of the rest of the design could be questioned later. So the racking cane pulled much hops and the filter appeared to catch 90%+ of the hops, I was definitely impressed. But you could almost watch the filter clog. The hops were so dense and the filter material so tight it actually caked all of the holes closed on the filter. First it slowed, then it stopped, at about 2.5 gallons. Experiment #1 = Failure. I would say that it slightly worked, but not with this design. It makes me wonder if the filter was longer how much better (or worse, that’s a big chamber to fill) it would do, say at twelve inches or eighteen inches long.

Hop Filter 2Second (Experiment #2) I tried the filter at the end of the racking hose. The idea here was similar to the little lint filter you would put from your washing machine before the utility sink. My expectations though were that it would work the same, that is it would clog internally and eventually lead to the beer “squirting” out through whatever opening were available. So I set the experiment up the same and began racking. This time things began to run fine, but after a short while it was obvious that more hop debris was getting through than the inline. It wasn’t a lot, but it was enough that a small circle of hop debris formed in the middle, maybe the size of a quarter, but quite possibly still enough to clog a keg. Eventually the flow began to slow and then all but stopped, again at about 2.5 gallons. Experiment #2 = Failure. This again lead me to question how much of a difference the length of the filter would make.

Hop Filter 3Third (Experiment #3) I tried the filter at the beginning of the racking cane. The idea here was similar to a fish tank filter where it draws the water from the tank up through a course filter and then through a fine filter, though I would not be including a fine filter. Also, just because I could and it kind of made sense, I used an extra piece of stainless steel filter material that was about twice as long to see if that helped. So I set the experiment up the same and began racking. No problems getting the flow going again this time. Almost instantly it was obvious that with this technique the most about of hop debris got through. Again, not really a lot, but maybe twice the amount then Experiment #2. The flow did slow and it took about ten minutes or so to rack the entire 5 gallons of hop-water, but it did rack and filter the entire 5 gallons. Experiment #3 = Partial Success. It was a partial success for it did filter out hop material, but it did not filter out all of the hop material. It did make me wonder how much of a difference the longer piece of filtering material made.

By this point I had been playing with the Hop Filter Experiment for a couple hours and was kind of burning out on it. So for now, I think it is pretty open-ended and inconclusive. I do wonder about lengthening the inline filter which was the one that filtered the best. I also wonder about possibly adding a filter at both the beginning and end point of the racking cane and hose, a double filter? What it really all boils down to is I just need to unlearn bad habits and relearn how to rack properly, because to me it must be my problem since no one else uses these kinds of products or else they would be commercially available. I also think if I dry hopped with whole hops I would have fewer issues, and if used with one of these filters could possibly have even fewer. Until the next experiment occurs.

Naked Wheat

Friday, August 15th, 2008

So after the RYPA kicked the Naked Wheat got to come on down and be the next contestant.

Wheat Pint

So this may not be the oldest keg (first-in-first-out mentality) that needs to go on tap, but it is a freshy summertime beer that needs to be on tap. So this was the first pint pulled from the kegerator, notice – no excessive foaming and the pour was much more the speed it was supposed to be, I was pleased. I agree (I can already hear you thinking it) there is very little head, in particularly surprising for a wheat beer, but as of right now I am not concerned. I also chose this beer to test the dry-hopping technique theory since this beer was not dry-hopped. So far so good. This beer is very easy to drink, nice and crisp and refreshing, like Summer in a glass. But I bet it won’t last the weekend; I heard Batman is supposed to come over this weekend, and if you know what that means, then you know it is always trouble.

RYPA, eeww…

Friday, August 15th, 2008

So the RYPA keg just kicked the other day, and eeww…

RYPA KEG 2

OK, it’s official, my racking technique sucks (especially after dry-hopping) and it took kegging to bring that to my attention. Now, don’t get me wrong, the beer tasted good, I actually want to re-brew it with closer to 40-50% rye. But, when I opened the keg, this is what I got to see, lots of debris that shouldn’t be there. The one sort of good thing about this is that I was having some troubles with excessive foaming and a slow pour for the second keg in a row (and only my first two kegs). I was actually quite worried that I was going to have some major kegerator issues and was starting to get a little down about it, but now seeing that my issues could be more because of the kegs/my technique I am feeling a bit more confident about the kegerator. I originally had 8 kegs of beer waiting for the kegerator to arrive, so now that it is here, we’ll have to drink our way through those 8 (especially any that were dry-hopped, about 5 or 6) and see what happens. Here’s another gross shot of my shitty racking techniques for your viewing pleasure.

RYPA KEG 1

Fool’s Gold Follow-Up

Monday, July 21st, 2008

So I guess this is the follow up of what’s happening with the Fool’s Gold, the first chosen beer to be on tap.

Fool’s Gold Bottling

So the Fool’s Gold was the first beer I put on tap, I thought it appropriate with my name in it (Fool) and some positive affirmation action (Gold) – – or something like that. Anyway, to no big surprise to me, I was having constant trouble with this beer on tap. It was a slow pour, it was foamy, the faucet was having some trouble, it wouldn’t pour at all, you know all sorts of newbie issues. Sure I was a little pissy and a little disappointed thinking there was something wrong with the kegerator, but I was willing to accept there would be a learning curve. One thing I really wanted to do but never got the opportunity was to play with my new Beer Gun and pull off a few bottles, partially just to do it, and partially to put a few aside for the 6th Fool Circle beer tasting (whenever that finally happens).

Well, I put a second keg in the kegerator last night to put on tap today to see if the pour problem was an obvious kegerator or keg issue, or obvious at all. I cleaned out the line and put keg number two on tap, the RYPA. It poured, period. It was foamy, and a little wild also, so I may have both kegerator (balancing) and keg issues, we’ll have to see. So I pulled the keg of Fool’s Gold into the kitchen and basically said “F-it” and decided I was going to bottle what was in the keg the “normal” way or at the least dump out the contents and see if I could tell what was happening.

The beer poured out with mad sediment, I was actually quite surprised. I guess I transfer more hop debris than I realize after dry hopping, yikes! I know I probably oxidized the hell out of the beer and knocked out most of the carbonation, but screw it, I’ve got five bottles out of it – waste not want not – if it tastes like ass I’ll dump it. After seeing how much debris was still in the beer I was guessing that I may have clogged the out-spout, which I actually had guessed since the beginning that it could have been a partially clogged spout causing some of the foam and the slow pour.

Fool’s Gold Clog

So I took the keg down stairs and began cleaning it and taking it apart. What I found was one clogged-as-shit out spout. There goes my ideas about keg hopping, well except maybe with whole hops. Speaking of which I may need to switch to whole hops for dry hopping too. So the good news is that I definitely had a clogged keg which I will say was why the pour stopped on the kegerator. The other problems (foamy, slow pour) I’m not sure if they were directly related. But the bad news is that I just discovered that you really need to be careful with transfers, and I have five other kegs awaiting to be drank before I realized this, ugh. Off the top of my head I know three of them were dry hopped, which may be my down fall. We’ll have to see how this all pans out. More news at eleven 😆 .